

William Imoh
6 min readJan 26 2021
Deploy a Gatsby Site to Digital Ocean in 7 Steps
Asides from the smooth development experience of using JavaScript, APIs, and Markup to build out JAMstack apps, the deployment process is also splendid. Multiple providers are available to deploy JAMstack, and we will discuss a preferred top 5.
In this post, we'll deploy a sample Gatsby.js application to Digital Ocean using the App Platform for static sites, in seven steps.
You can find the sample Gatsby repository with the default starter here.
Like most hosting providers for JAMstack apps, Digital ocean provides a generous free tier to host and manage web apps. Digital Ocean issues a $100 credit on signup. The free plan covers the requirements to try out the platform. However, two offerings stood out, which are:
- Unlimited team members
- DDoS protection
We'll proceed to the seven steps required to deploy a Gatsby.js app to Digital Ocean.
Step 1: Create an account
Create a Digital Ocean account or sign in to an existing one here. Once you create a new account, you'll receive $100 free credits.
Step 2: Create a new app deployment
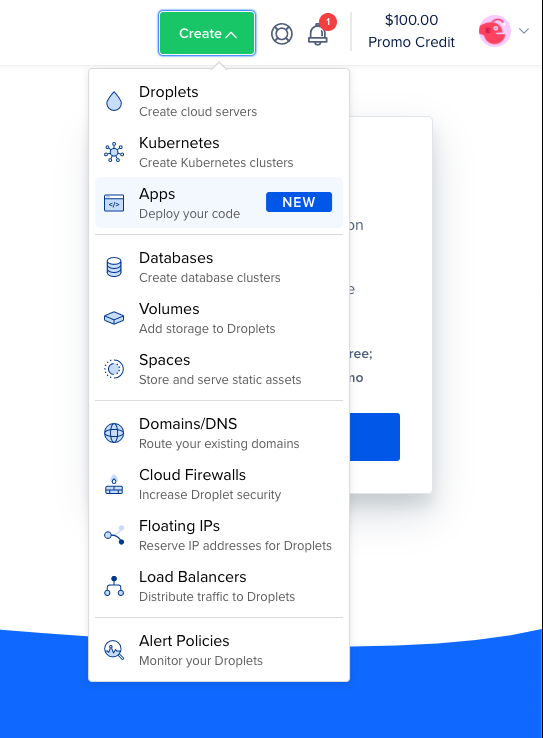
On the top right corner, click the "Create" button to select an option. For our JAMstack use case, we'll use the "Apps" option.
Step 3: Add a repository source
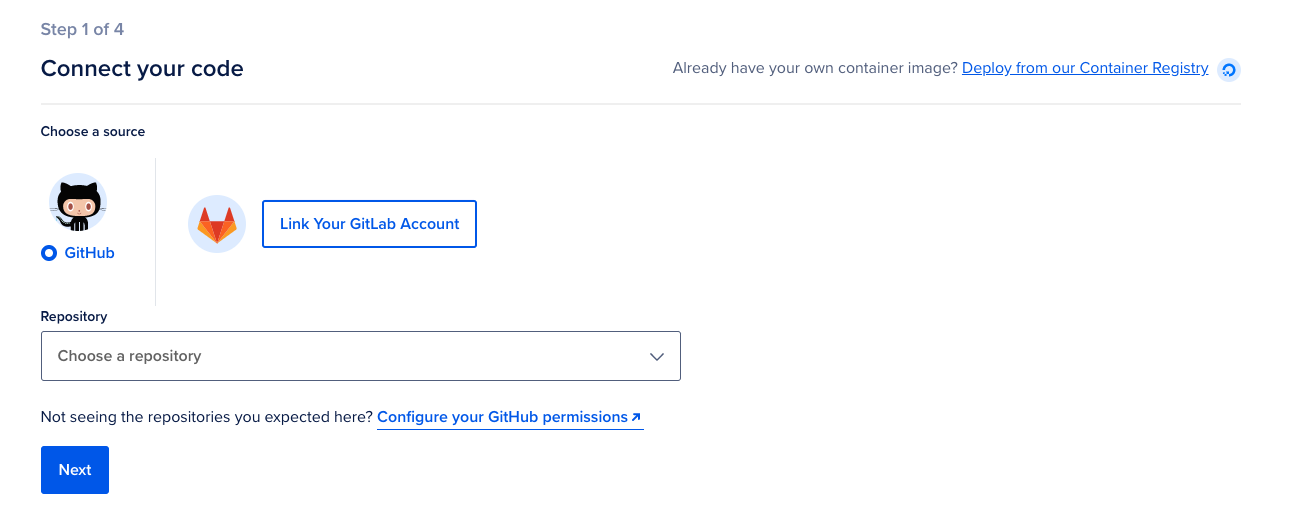
App platform deploys applications from remote repositories (currently GitHub and GitLab). This also ensures we can set up a standard CI/CD pipeline that redeploys the code changes in the repository.
In this step, select your repository provider. We use GitHub as that's the source of the project repository. A prompt is opened in a new window to install Digital Ocean to an organization on your verified GitHub account. Follow the prompts and proceed to the next step.
Step 4: Select a project repository
With Digital Ocean installed, select a repository from the dropdown of repositories. Only repositories you have access to, belonging to organizations with Digital Ocean installed are displayed.
Step 5: Configure the app
Next, select a name, server region, and deployment branch for your app. An important option to choose is the auto-deployment option on code changes. Tick the checkbox if you want this.
Digital ocean detects the application technology and prefills the next page with the application options.
Step 6: Configure build settings
Set up your build command for this project, yarn build, which is prefilled, will suffice. Add your environment variables to the project, if any. Include the output/build directory. An omission will lead to an auto option selected, which detects the project's build directory. Click the next button to proceed.
Step 7: Select a plan and deploy
On this page, select a plan for the project. The starter plan is just enough for this demo. You can explore other available paid plans if it matches your requirement. Click the launch starter app button to deploy the app.
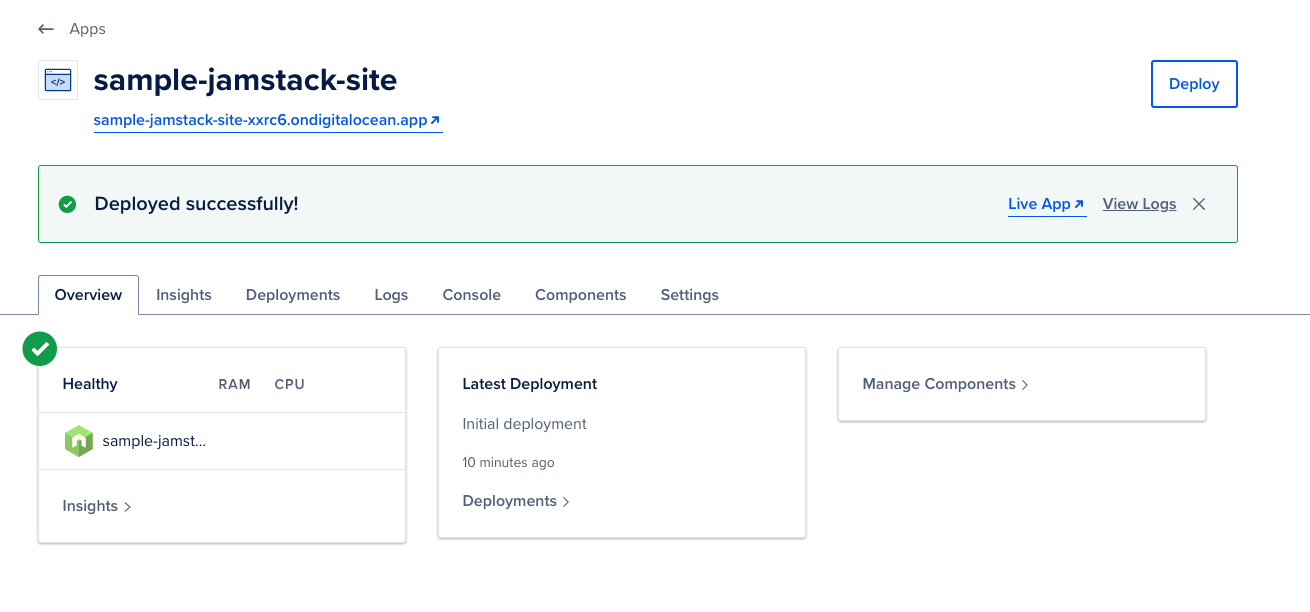
The application deployment took about 9 minutes to complete. Several build, and optimization improvements can be made to deploy in lesser time.
The resulting app is served super fast, customary with Digital Ocean deployed sites served over a CDN.
You can find the bare deployed Gatsby site here.
Summary
In this post, we deployed a starter Gatsby site to Digital ocean in seven steps, from account creation to live site. In the next post, we'll deploy to another hosting provider. If you're reading this, you could share with me your preferred provider to be featured.
About the author
I love solving problems, which has led me from core engineering to developer advocacy and product management. This is me sharing everything I know.
More articles


Akshat Virmani
6 min readAug 24 2024
How to add GitHub Copilot in VS Code
Learn how to add GitHub Copilot to Visual Studio Code for AI-assisted coding. Boost productivity, reduce errors, and get intelligent code suggestions in seconds.
Read Blog

Akshat Virmani
6 min readAug 09 2024
Common API Integration Challenges and How to Overcome Them
Discover common API integration challenges and practical solutions. Learn how to optimize testing, debugging, and security to streamline your API processes efficiently.
Read Blog

Akshat Virmani
6 min readJun 20 2024
Web Scraping using Node.js and Puppeteer
Step-by-step tutorial on using Node.js and Puppeteer to scrape web data, including setup, code examples, and best practices.
Read Blog