
Practical Steps to Deploy a Node.js App with NGINX and SSL
Learn how to auto-deploy a Node.js application with NGINX by creating a Droplet in DigitalOcean for the application, setting up NGINX as a reverse proxy server, and setting up SSL for security.

There has been a rise in the need for developers to automate application deployments to speedily deliver value to users.
Developers employ Continuous Integration/Continuous Delivery (CI/CD) tools like NGINX. These tools have their unique benefits; to highlight a few, NGINX provides load balancing, acts as a reverse proxy server, does caching, manages containerized applications, and deploys microservices.
In this article, you will learn how to automate the deployment process of a Node.js application with NGINX and SSL.
Prerequisites
To follow along with this tutorial, you will need the following:
- A Github Account
- A DigitalOcean Account
- Node.js installed
- Docker installed
- SSH server installed
- A Domain name and hosting
- Visual Studio Code editor
- Terminal
Note this tutorial uses Ubuntu 20.04 operating system and Node.js v10.19.0.
Demo: Setting up the Node.js Application
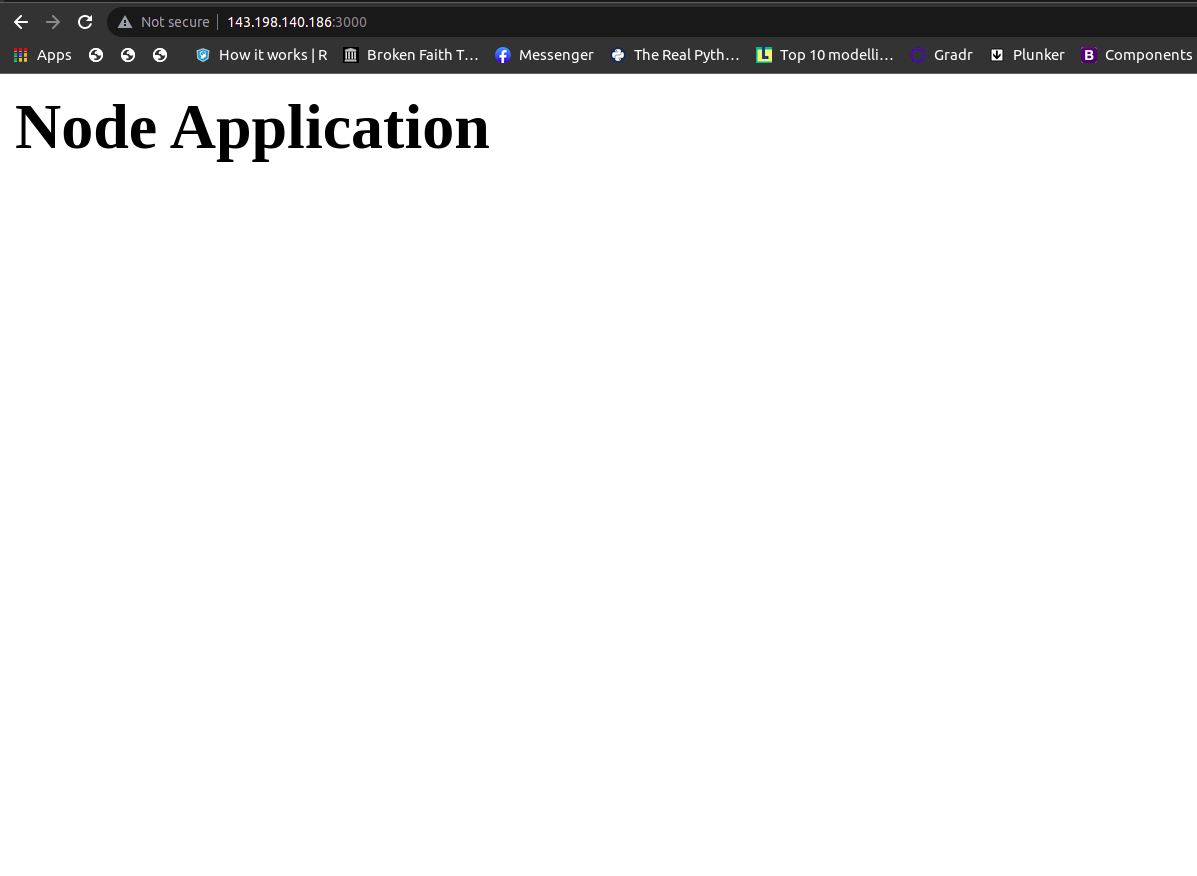
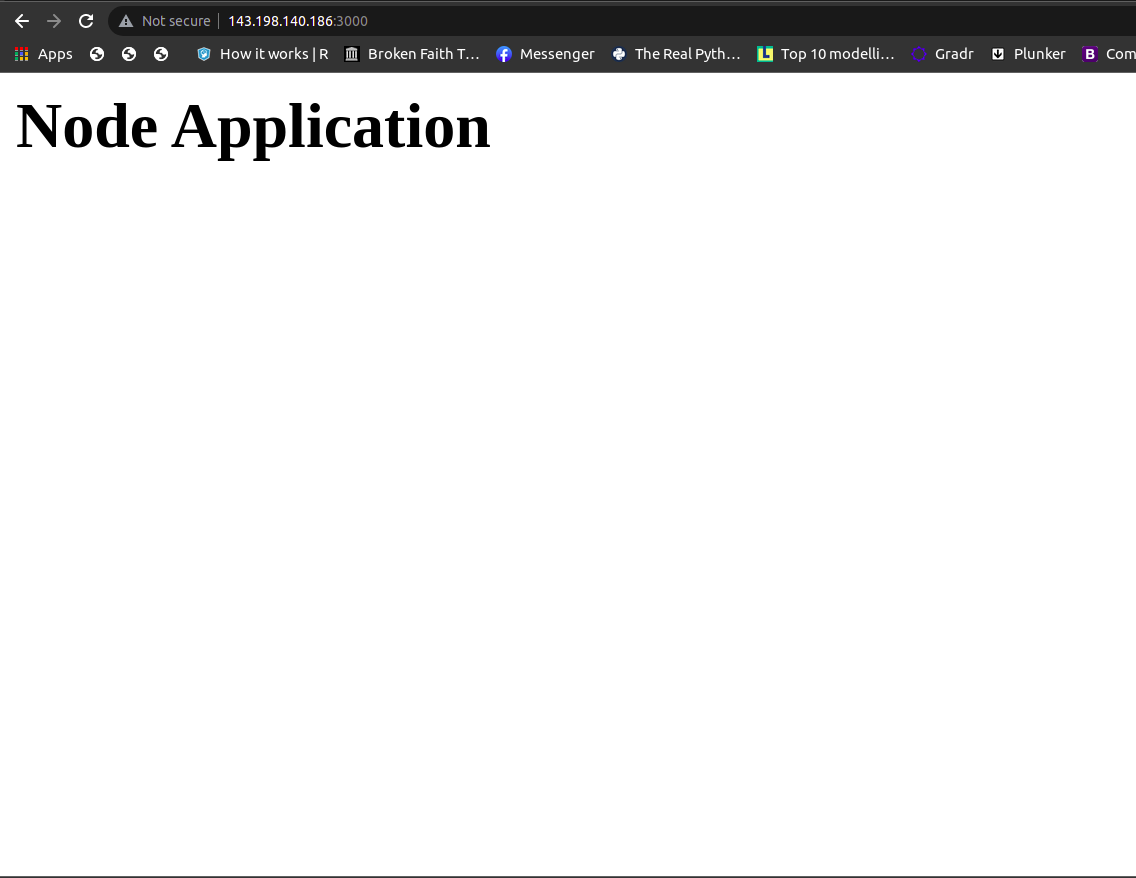
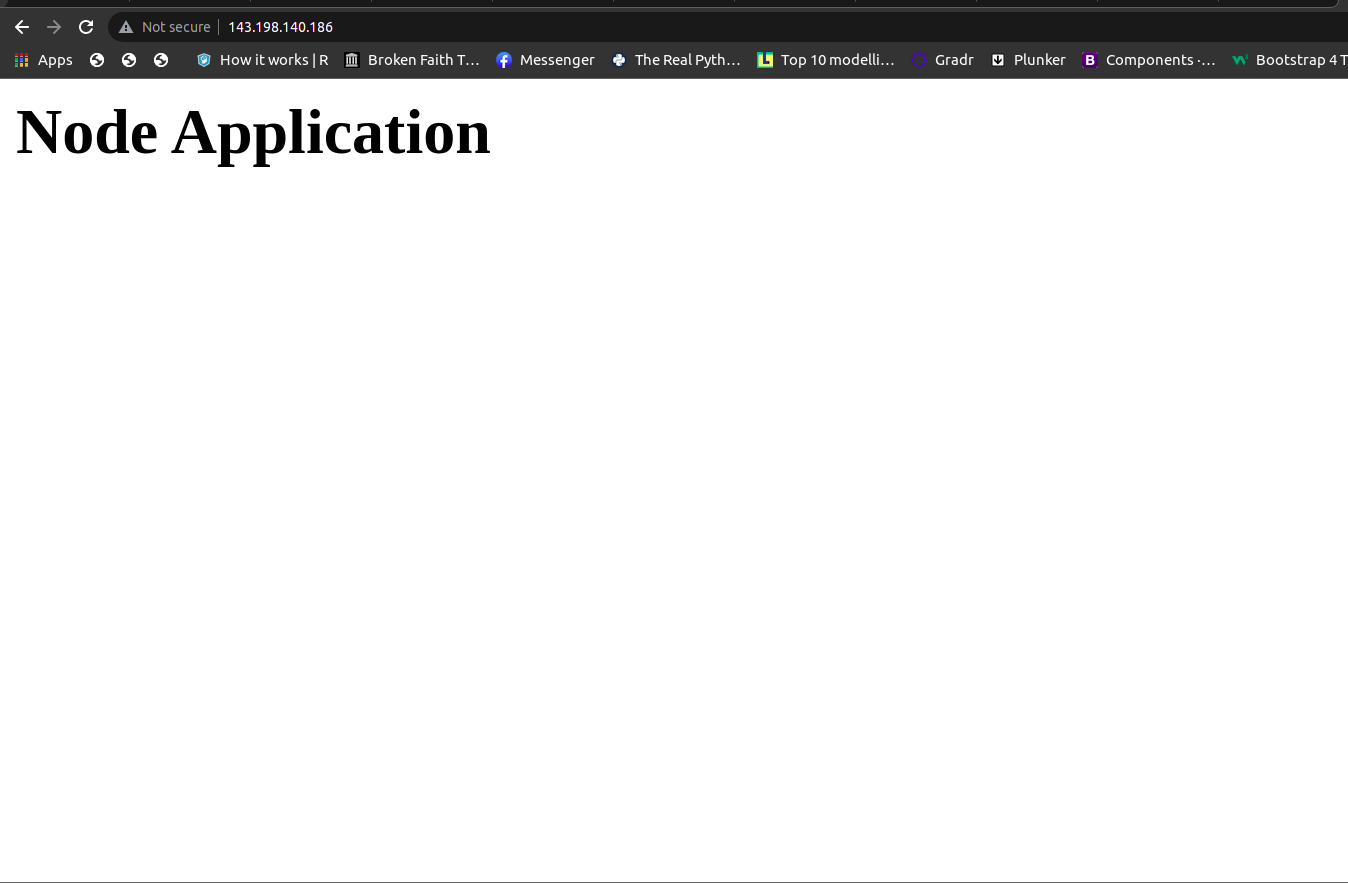
For this tutorial, you will use a Node.js application built with Express.js running on PORT 3000 that displays the text 'Node Application' in the browser.
Get the application by cloning the repository on GitHub. Then, run npm install to install the dependencies and nodemon app.js to run the application locally.
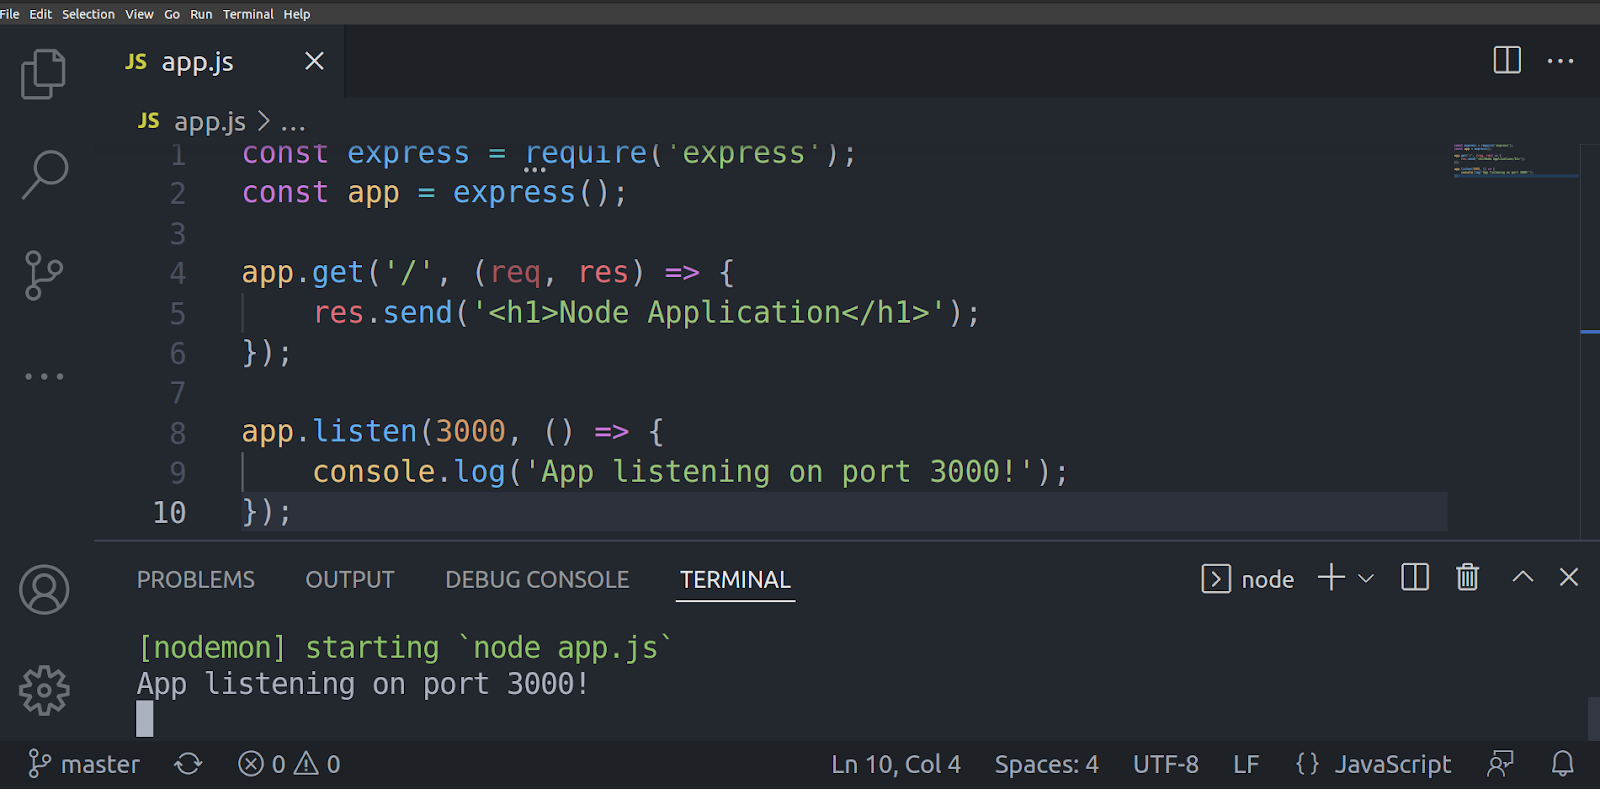
Ensure that the application is running by going to 'http://localhost:3000/' in your browser:

Now that your application is up and running, you can move forward to setting up NGINX and SSL.
Practical Steps to Deploy the Node.js App with NGINX and SSL
To begin, you need to set up SSH keys that you will use to authenticate the Droplet you create on DigitalOcean.
Once you have your SSH keys set up, log in to your DigitalOcean account; then, follow the steps outlined below to create your Droplet for the application using the SSH keys you have set up.
Creating a Droplet on DigitalOcean
In your DigitalOcean account, create the Droplet by clicking 'Droplet' in the dropdown:

Then, a page opens that highlights the Ubuntu operating system used for this tutorial:

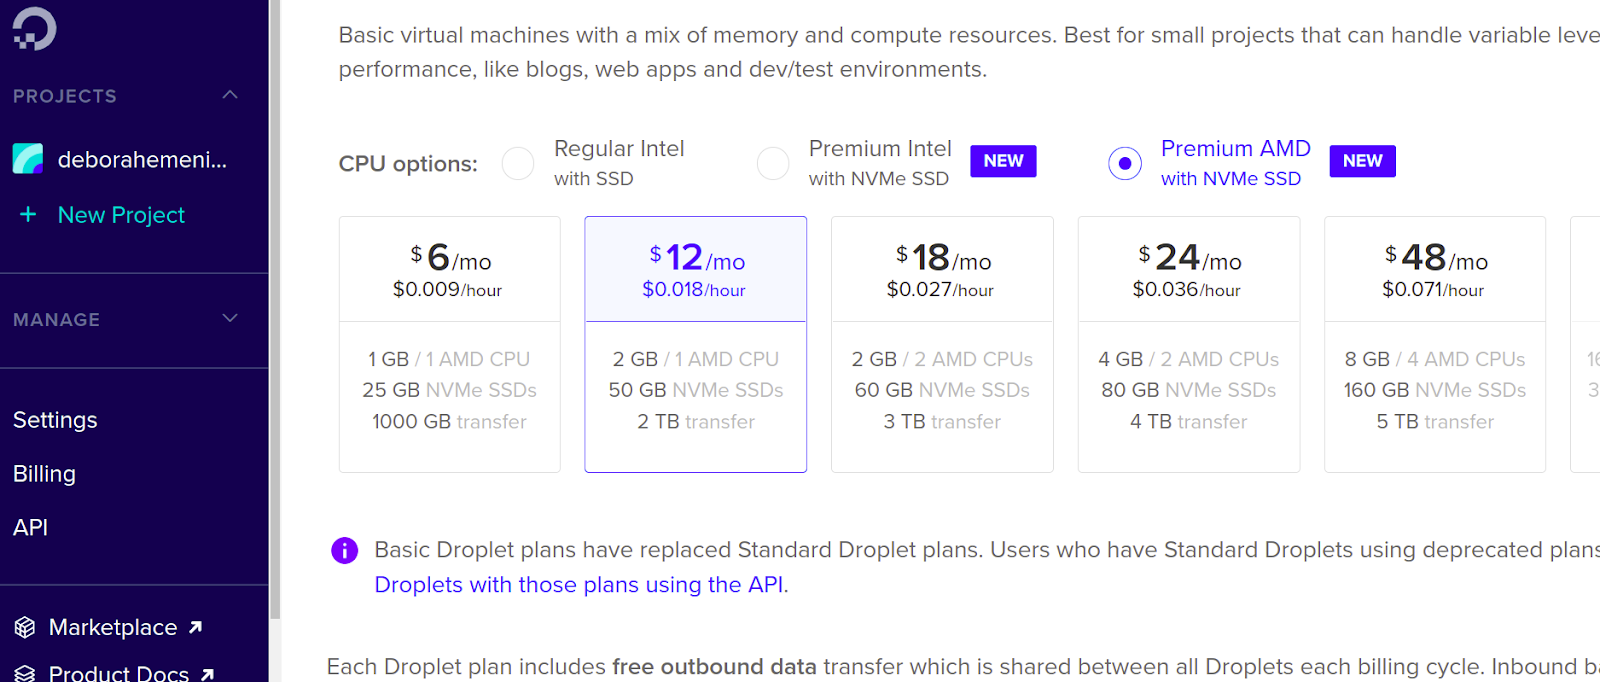
Choose the $12 plan from the options provided:
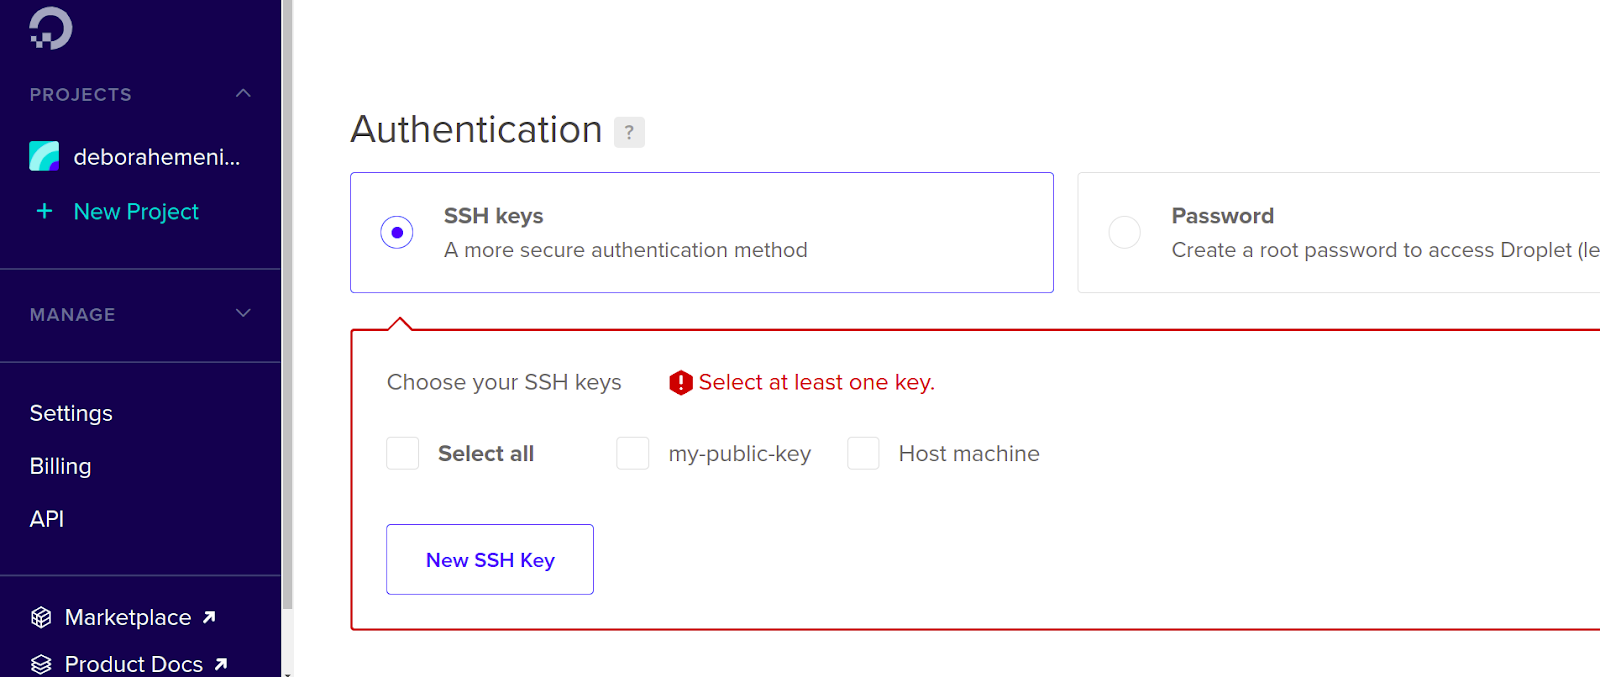
Select SSH keys as your authentication method because it is more secure than a one-time password:
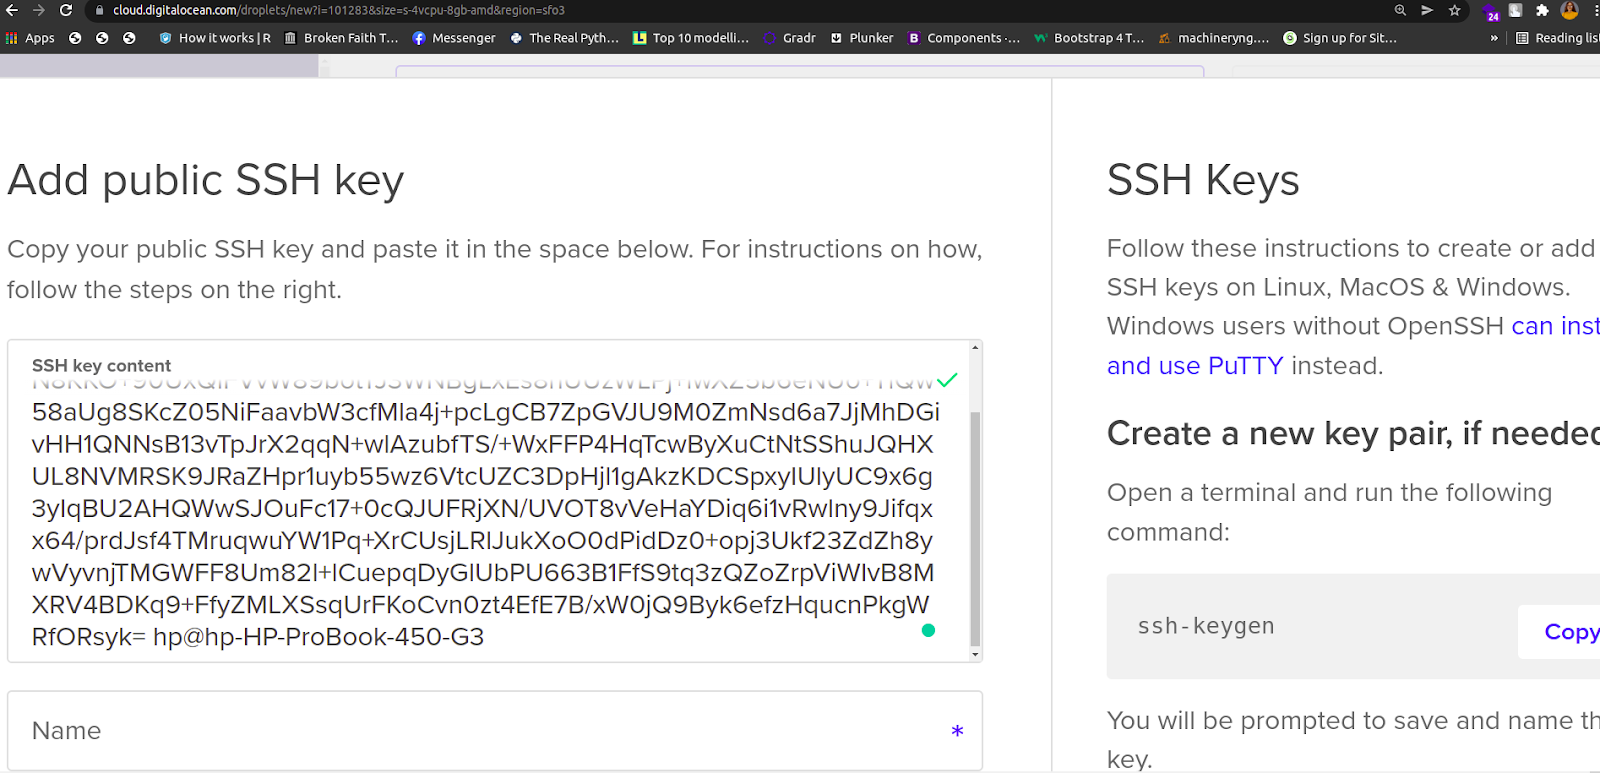
Run this command and copy your SSH public key:
cat /home/hp/.ssh/id_rsa.pub
Click New SSH key in your Droplet and paste the key:
Name the SSH key and click Add SSH Key and choose the name of the SSH key:

Next, name your Droplet by choosing a hostname:

Then click Create Droplet and you will successfully create your Droplet:

Log in with SSH
To login to your Droplet with SSH, you will use the IP address of the Droplet:

Copy the IP address and log in as a root user with the following command. Replacing <your_ip_address> with the IP address:
ssh root@<your_ip_address
After running this command, you will be prompted a question asking you if you want to continue connecting; enter yes, and log in:
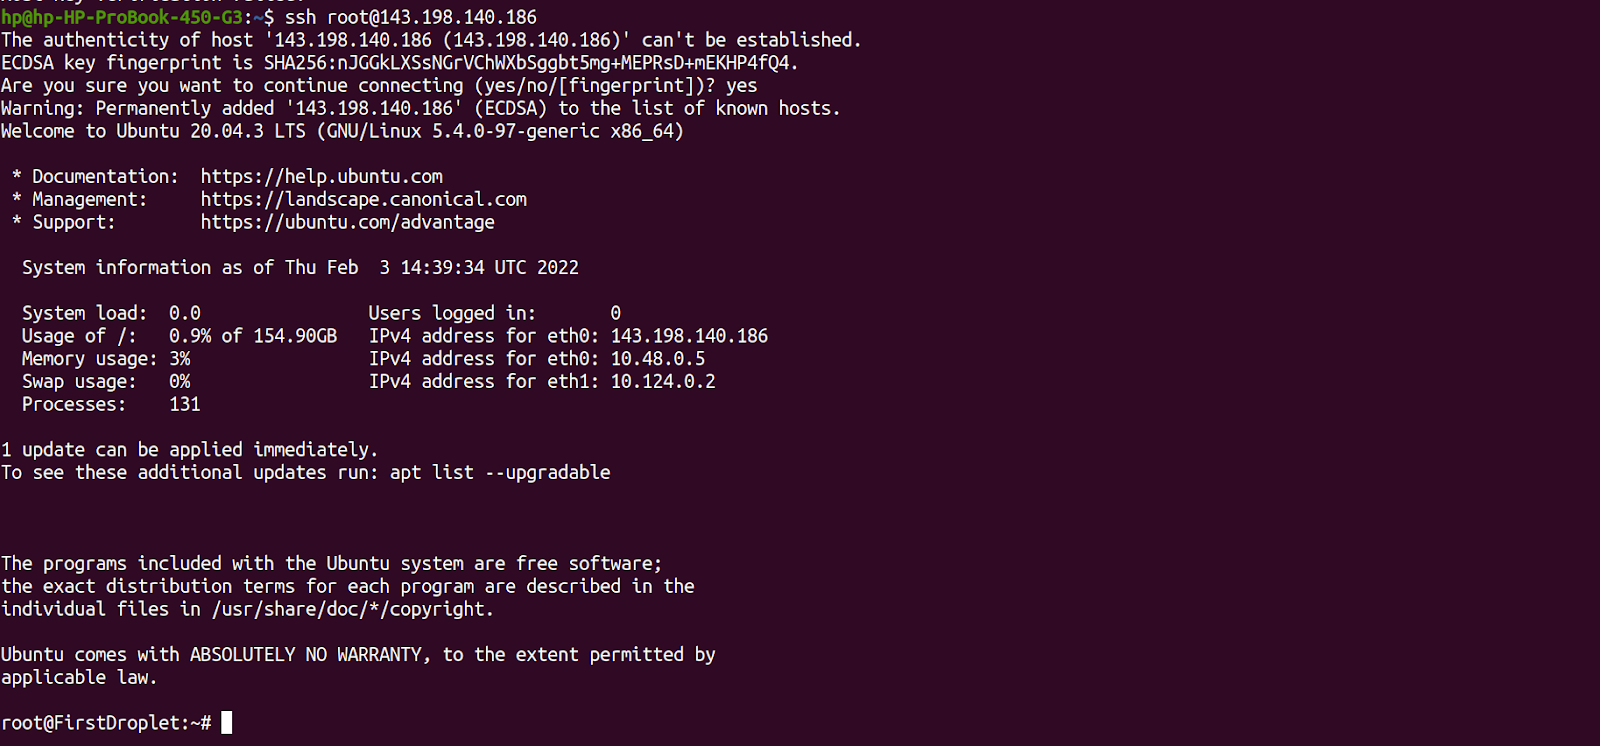
Notice that the prompt changes to root@First****Droplet. It changes to root, followed by the Droplet's name, and confirming your successful login to your Droplet via SSH.
You need to update your package repository and install Node.js and npm on your server; run these commands:
sudo apt update
curl -sL https://deb.nodesource.com/setup_16.x -o nodesource_setup.sh
sudo apt install nodejs
sudo apt install npm
To confirm the installation, run node --version and npm --version.
Setting up the Application on the Droplet’s Server
Now you can set up the Node.js application on the Droplet's server. Here are the following steps:
Create an application directory on the server
First, you need to create a directory to house the application on your server. Run mkdir app to create a directory app. Then, run cd app to change the directory into the app directory:

Get the project from the public repo
Clone the application from Github with this command:
git clone https://github.com/debemenitammy/sample_node_app.git

Run npm install to get your node modules folder and dependencies installed in the application:

Then, run the application with node app.js and notice that it is running on PORT 3000:

Go to <your_ip;_address>:3000 URL on your browser, replacing <your_ip_address> with your Droplet's IP address:
Open your DigitalOcean account and view your Droplet. You should see your application existing in your Droplet.
Setting up Production Process Manager (PM2)
Your application is currently running on this port <your_ip_address>:3000. If you decide to end the process by typing the CRTL C command in your terminal, the application stops running.
To run the Node.js application as a background process and in a production environment, you can use a PM2 - Production Process Manager tool.
In this section, you'll see how to set up this PM2 tool. Here are the following steps:
Install PM2
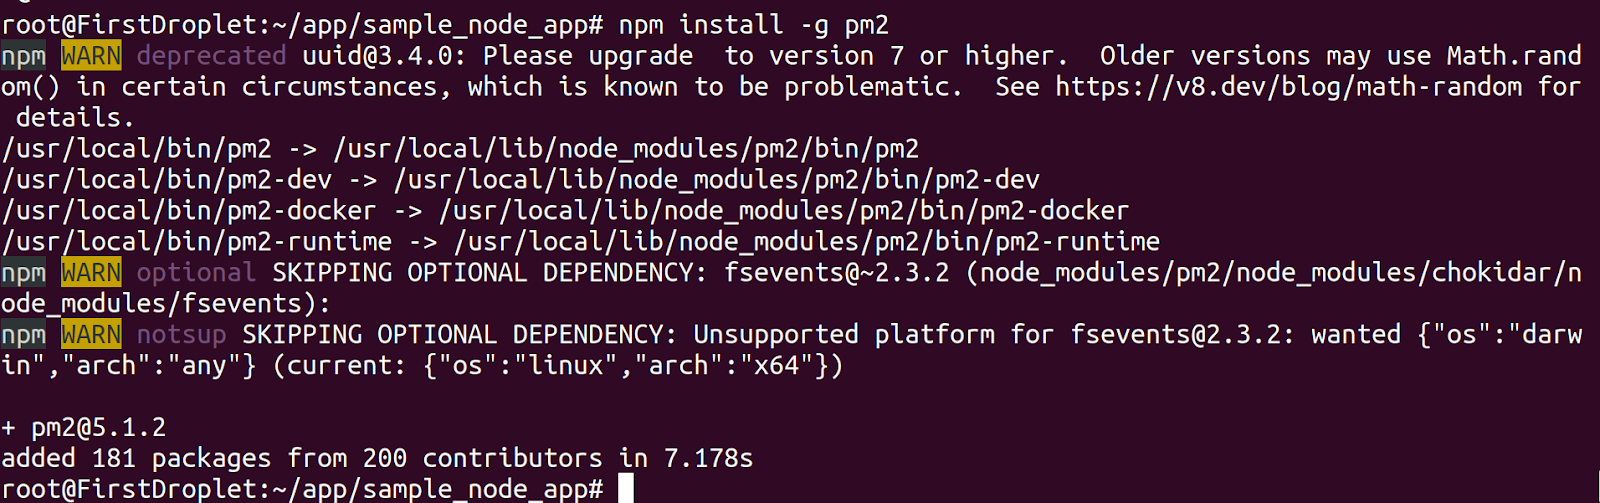
Run CTRL C to quit the application running in the terminal and run this command:
npm install -g pm2
Now that you have PM2 installed, you can use it to start your application in the terminal with this command:
pm2 start app.js`
Once you run this command, it should display the following in your terminal, showing that you have successfully started your application with PM2:
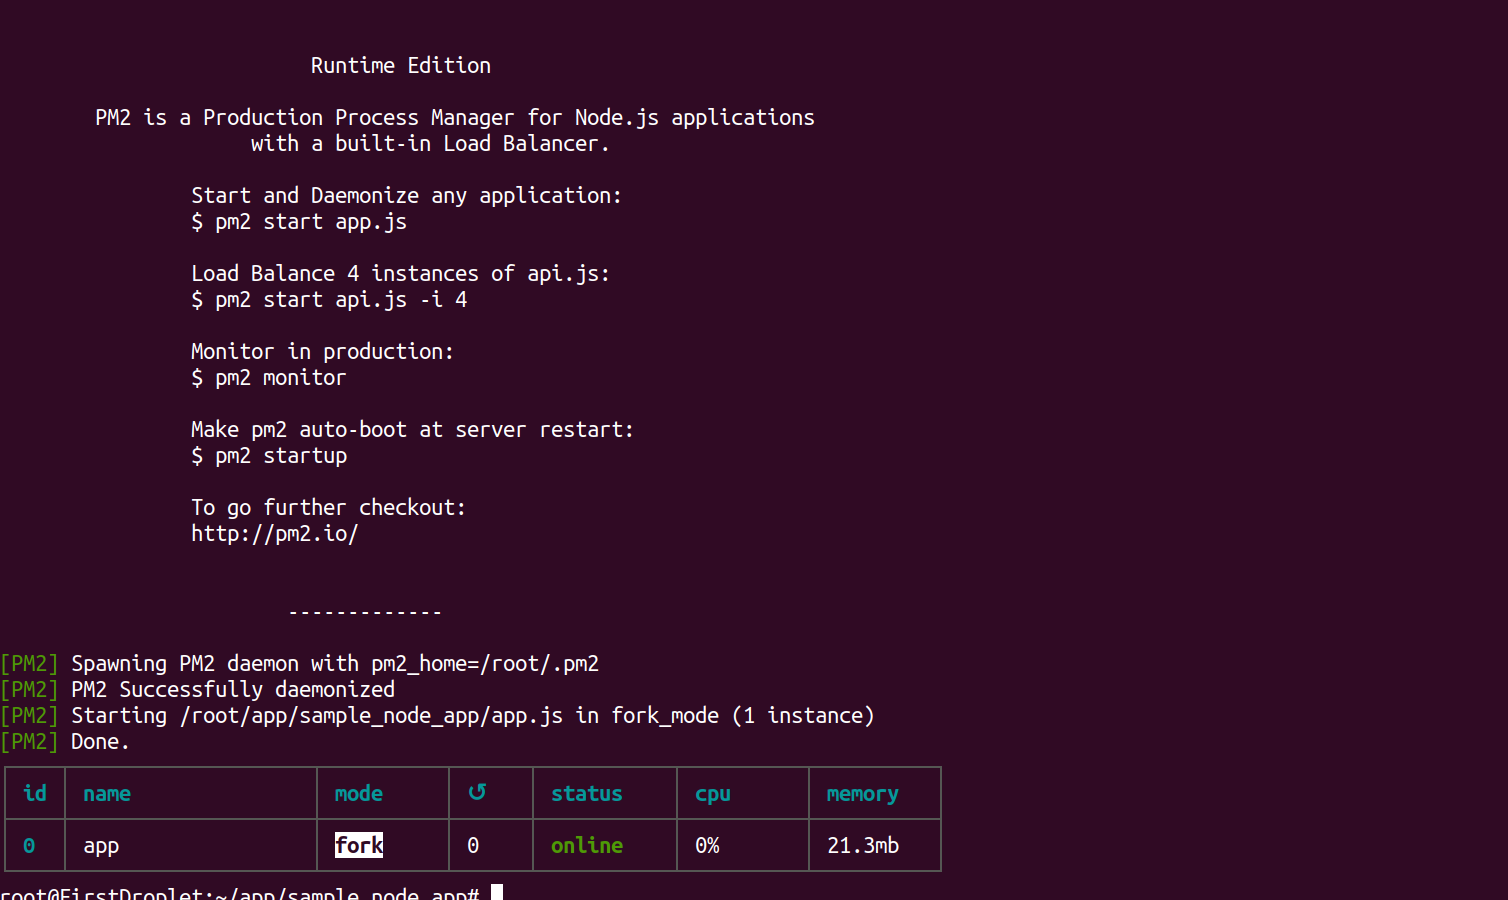
The above screenshot shows that the application is running by displaying the status as online, as seen in the table containing id, name, mode, CPU, and memory.
You would also notice that the terminal doesn't show that the application is running as it was when it was running with node app.js. This time the application is running in the background due to the help of the Process Manager tool (PM2).
In addition, to confirm that your application is running, go to your browser and refresh:
You will see that the application is still running.
Run pm2 status to see the status of the application:

Then, run pm2 startup ubuntu to ensure that the application runs anytime there is a reboot:

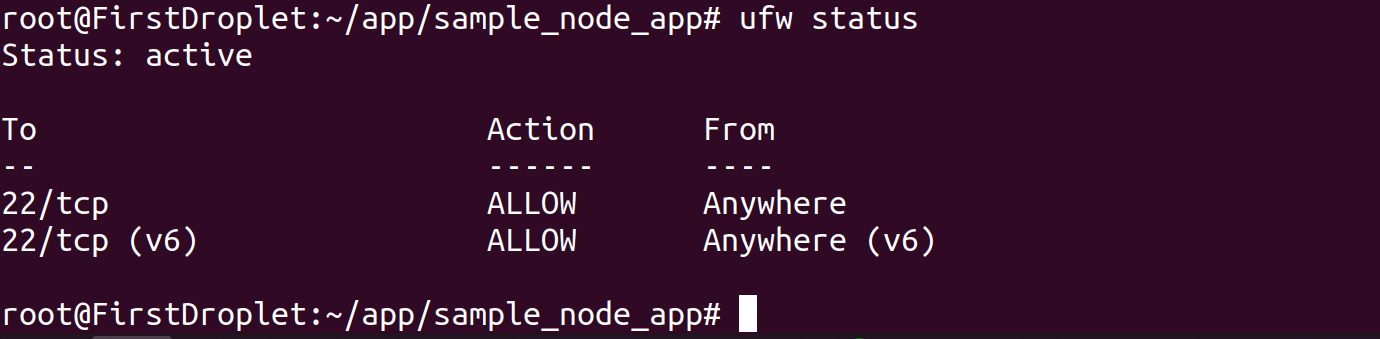
Also, you need to enable the firewalls with ufw enable. Type 'y' at the prompt:

Run ufw allow ssh to allow ssh:

Run ufw status to confirm that your firewall is enabled:
Next, run ufw allow http to allow Nginx to run the application on port 80:

Also, run ufw allow https to allow Port 443 - the HTTPs port. Finally, run ufw status to see the ports that have been allowed:
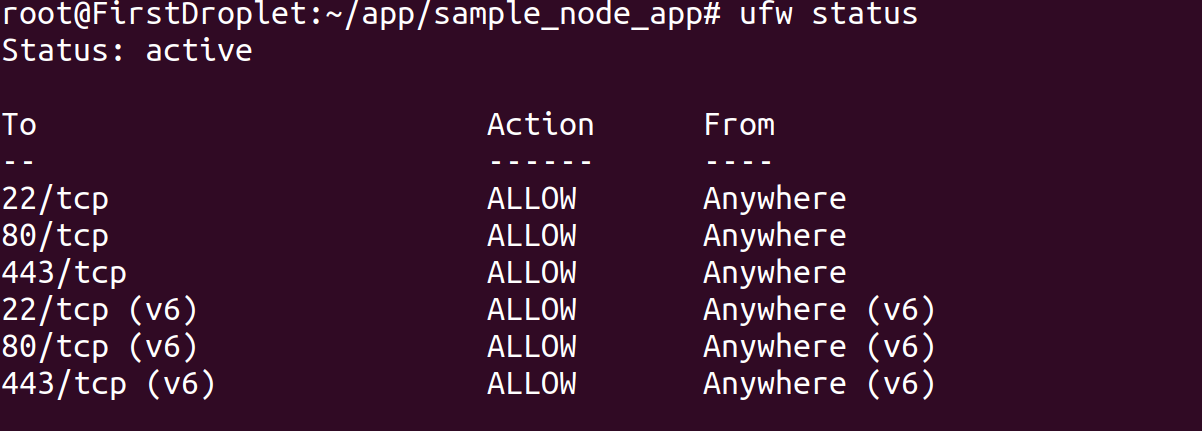
From the above screenshot, you can see that port 443 and port 80 have been allowed.
Setting up NGINX as a reverse proxy server
Here, you will learn how to set up your NGINX server as a Reverse Proxy to render your application running on port 3000 to access it on port 80.
To access your application with just your server's IP Address, you can achieve this with NGINX.
To get started with NGINX, use the following steps:
Install NGINX
Run this command below to install NGINX:
sudo apt install nginx
To confirm the installation of NGINX, go to your browser and enter the IP address of your server as the URL (the Droplet's IP address). You should see a default message showing 'Welcome to NGINX':

You can now access the default NGINX configuration file at this path - /etc/nginx/sites-available/default.
Editing the configuration file
To edit the configuration file, use the following command:
sudo nano /etc/nginx/sites-available/default
Once you run this command, you should see the following in your terminal:

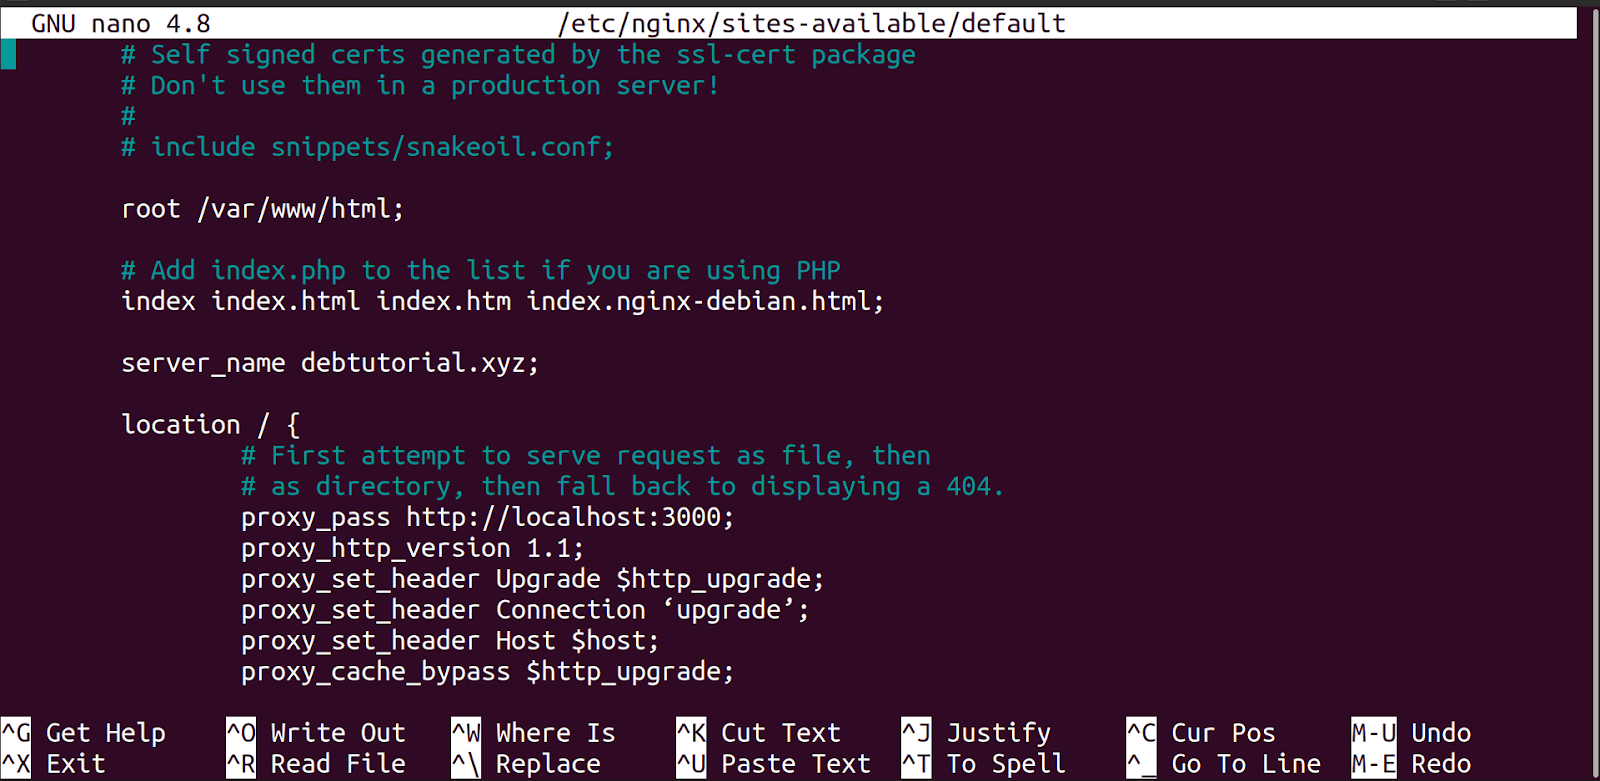
Next, to set up your reverse proxy, scroll down the server block till you get to the location as follows:
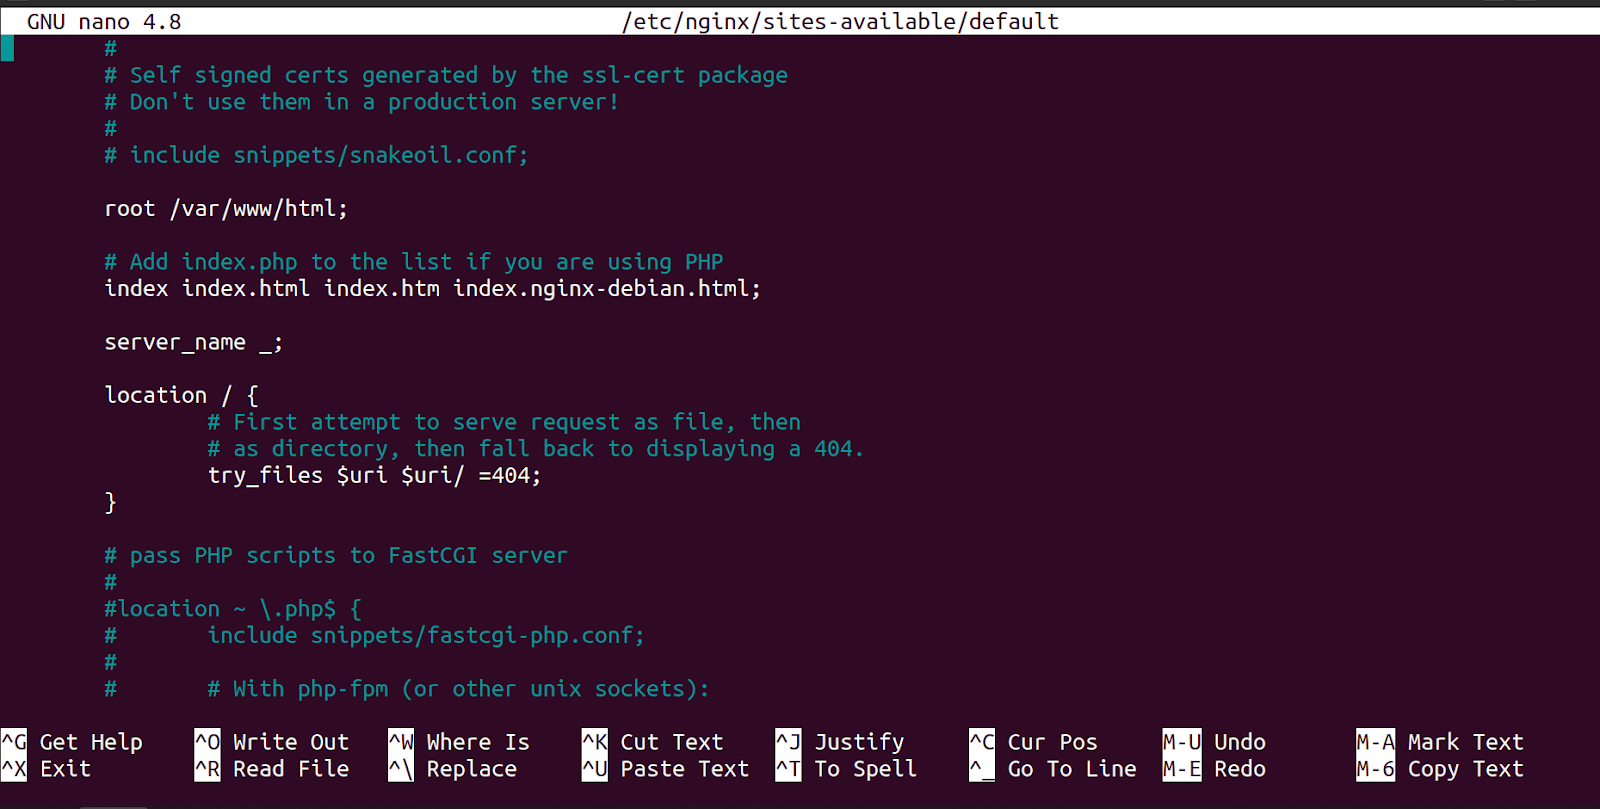
Then, delete the try_files $uri $uri/ =404 line and replace it with the following:
proxy_pass http://localhost:3000;
proxy_http_version 1.1;
proxy_set_header Upgrade $http_upgrade;
proxy_set_header Connection ‘upgrade’;
proxy_set_header Host $host;
proxy_cache_bypass $http_upgrade;
Visit NGINX documentation for more information.
In the location, you just set up your reverse proxy to ensure that when you visit port 80, it loads your application running on port 3000.
In addition, you can add your domain name to the server_name to set what NGINX should listen for alongside your port settings.
Otherwise, you can leave it as the default. So, type your domain name in your server block as follows:
Now, you save the changes you have made to the configuration file by typing the CRTL X command and ’yes’ at the prompt. Then, it will ask for the file you want the configuration saved into; press ‘enter’ as follows:
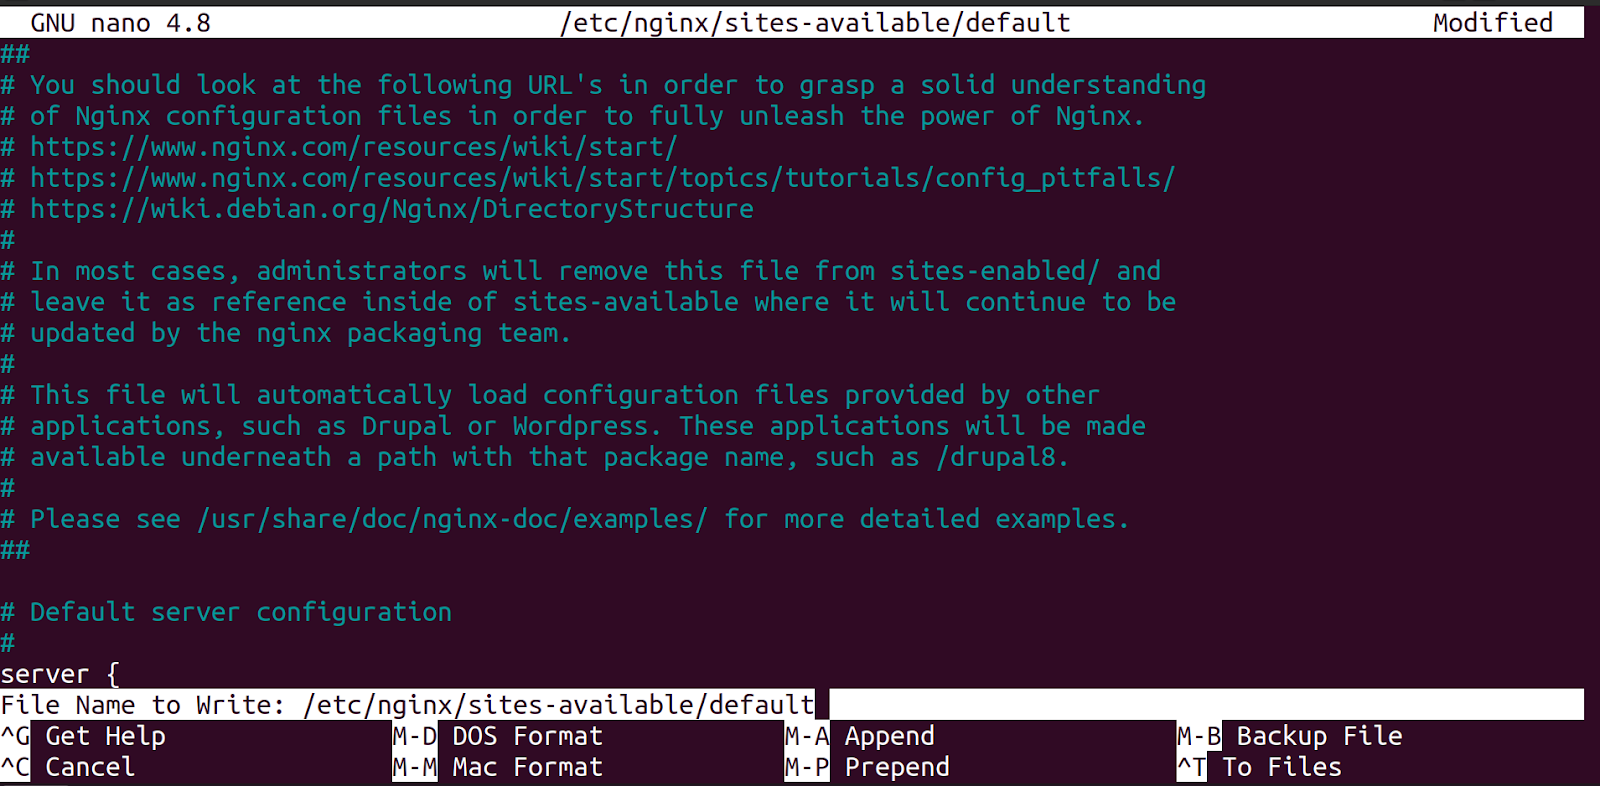
Once you press ‘enter’, the nano configuration window automatically saves and closes.
Test the NGINX Configuration and Restart the NGINX Service
It is advisable to always run the sudo nginx -t command that runs a test on the NGINX configuration anytime you make changes to it. So, run the command as follows:
sudo nginx -t
Once you run this command, you will have the following output:

So, it says the configuration file test is successful.
The next step is to restart the service to load the new configuration you just changed for NGINX. NGINX will shut down the former worker processes and start new worker processes by applying the new configuration.
So, run the following command to restart the service:
sudo service nginx restart
This command doesn’t log any output to the terminal.
As NGINX restarts, navigate to your browser at the IP address and refresh:
Notice that the IP address is now rendering your application, it shows that the configuration you added to NGINX to act as a reverse proxy was successful.
Include Domain Name in Droplet
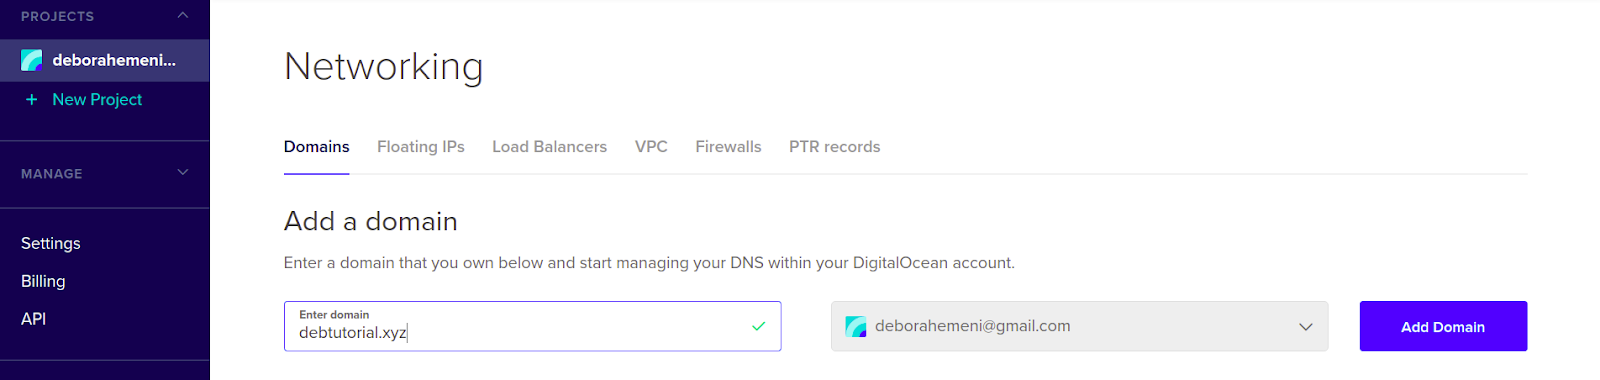
The next thing you need to do is add your Domain name to your Droplet in DigitalOcean. Go to the Networking page, enter your domain name in the Domain tab and click ‘Add Domain’:
Then, create a record for your domain name by following the instructions:
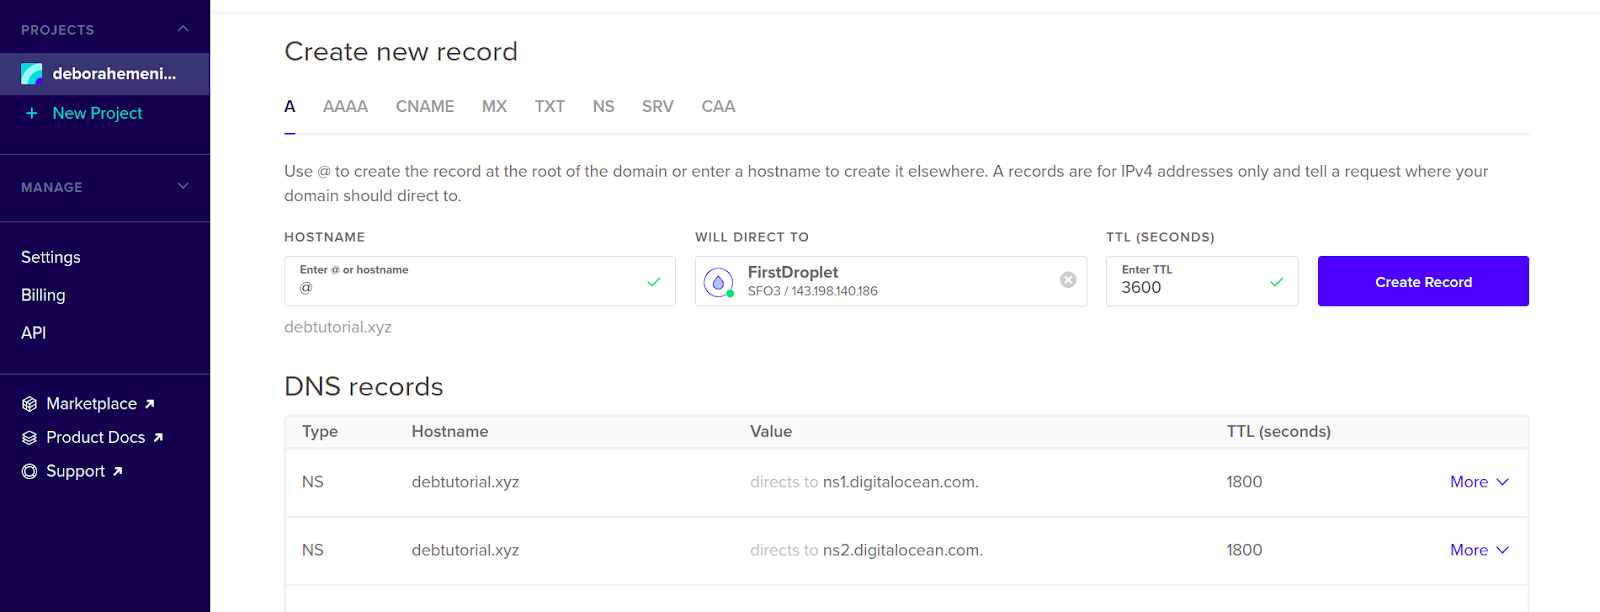
Also, add ns1.digitalocean.com, ns2.digitalocean.com, and ns3.digitalocean.com as your custom nameservers in the DNS records.
You have successfully added your domain name.
Setting up SSL
To secure your server, you need to set up SSL for the server. You will use LetsEncrypt - a certificate authority that will allow you to provision a free SSL certificate for the domain of the application. Run these commands:
sudo apt install certbot python3-certbot-nginx
sudo ufw allow 'Nginx Full’
sudo certbot --nginx -d your_domain_name
On success, you have successfully set up SSL for your application.
Conclusion
Finally, you have reached the end of this tutorial, where you learned how to auto-deploy a Node.js application with NGINX by creating a Droplet in DigitalOcean for the application, setting up NGINX as a reverse proxy server, setting up SSL for security, e.t.c.
The following resources might be helpful: